For preliminary consideration, links to notes on preparing movies files, as media or audio-visual outputs:
- Output and presentation specifications for projects as movie files
- Exporting media files from Premiere
- Adobe Audition notes
- Adobe Premiere notes
The purpose of adding “bars and tone” at the start, or head, of a media file, is for important technical reasons. They act as visual and audio reference.
For image, the colour bars consist of primary colours red, green, blue, secondary colours yellow, cyan, and magenta, and white and black and tones. When a movie is presented on a monitor or projected on a screen, a person can gauge the reference colours, to evaluate if a particular colour channel or brightness value is off. You will also use the bars as reference for the post-production colour correction and grading of your film.

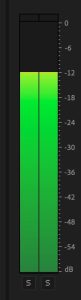
Similarly, for audio, the tone is at 1000 Hz, at a volume of -12dB (decibels). For presentation purposes, a person will set the amplitude of the speakers on the monitor or projection system, to ensure the overall audio is at a suitable volume. In other words, before the film is projected, to be certain sound is not too loud or soft, they will adjust the output, to be at a reasonable setting.
At the creation stage, you will need to mix the audio, keeping mindful eyes and ears on the VU meter (volume units) in either the Premiere or Audition workspaces. The spectrum of amplitude will need to generally be in the range from -18 to -14 for quieter sounds to -6 dB for louder peaks. The reference tone indicates the middle area, identifying generally how loud the file is for playback and presentation purposes. One shouldn’t have to turn volume up or down when presenting the piece.
To add Bars and Tone
Referring to the Main Menu, go to File > New > Bars and Tone.
From the New Bars and Tone window, you will need to keep to the same settings as the Premiere Sequence you are working with. For instance:
- Video Settings:
- Width, 1920 and Height, 1080
- Timebase: 24 fps
- Pixel Aspect Ratio: Square Pixels (1.0)
- Audio Settings:
- Sample Rate: 48000 Hz
Premiere will add the Bars and Tone to the Project Window, which you would then drag and drop the material (which will act like a movie clip with both video and audio) to a Sequence.
Typically, you should organize a Premiere Sequence to include black at the head of the piece, fades or dissolves, plus a title and credits, and black at the tail. Then add bars and tone at the very start, at “Frame 0.” They last for 5 seconds. The organized film elements come after that.
Or, alternatively, establish a separate “technical output” sequence, insert bars and tone, and then drop in the sequence with blacks, titles, credits, and so on.
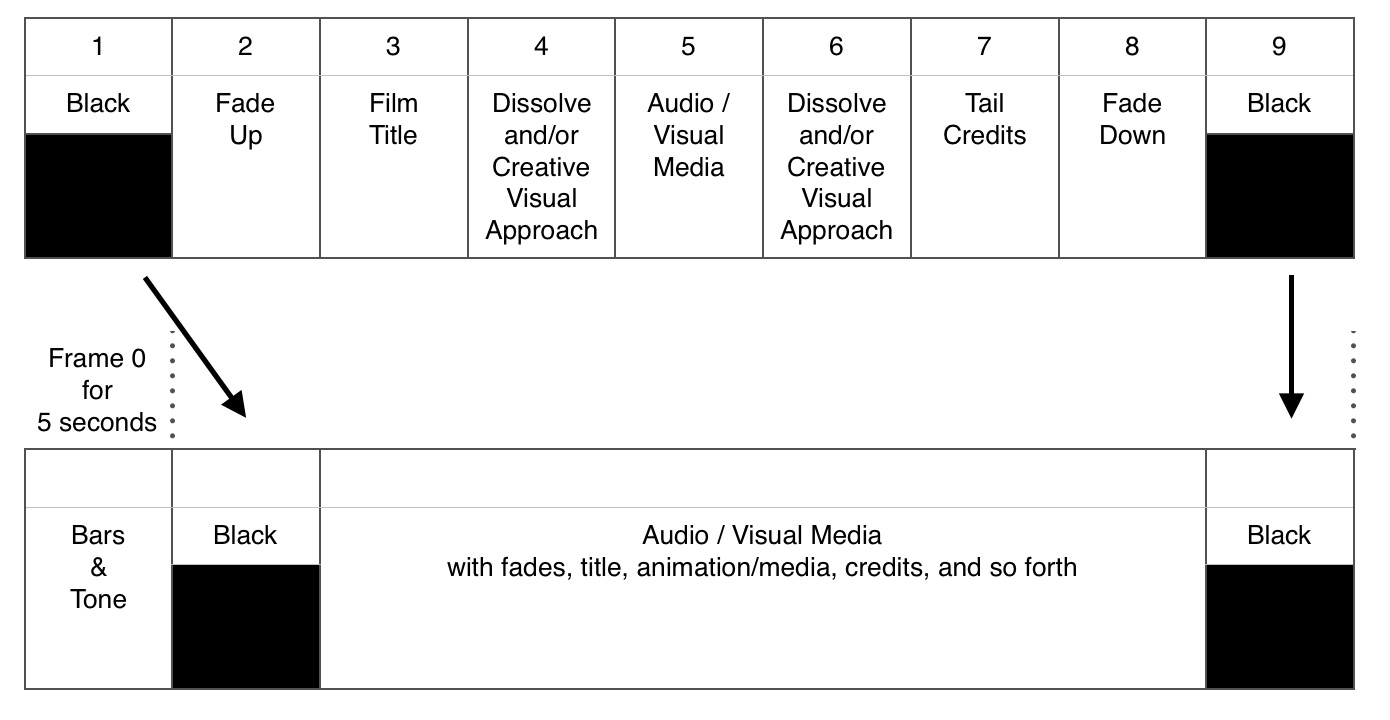
The important thing is to utilize the colour bars and tone for sound editing and colour correction.
You won’t always export movie files with the bars and tone. Instead, you can set in and out points or the work area to export without them. Then, you will be certain the audio levels for your film reference the -12 dB levels of the tone. Furthermore, colour and brightness of imagery will be anchored to the primary and secondary colours and tonal range, referencing the colour bars.