Useful sites dedicated to Dragonframe
An important first step
Create a folder for your project. The organization structures of workstations and Emily Carr vary slightly.
-
- Foundation iMacs, Apple = Movies > Your Folder
- Animation Puppet Studio, Windows = Scratch Disk > Your Folder
Check the camera settings
-
- Look on the side of the lens and make sure the Auto Focus is set to AF. With this setting, you will be able to adjust the focus from the software. (It is likely that everything is fine.)
- Be certain the Program Options dial on the camera is set to Manual (M). Dragonframe will not work unless it is set on M.
Before you load Dragonframe
-
- Turn on the power switch on the camera.
- Turn on the rostrum lights or light stands, and turn off the overhead room lights.
- Similarly, when you have finished the shoot, turn off the camera power, switch off the rostrum lights and lamp stands, and turn on the room lights. Also, be sure to tidy up after the shoot.
Start up Dragonframe
-
- From the Dragonframe start-up menu, choose “Create New Scene.”
- From the New Scene dialogue box, name the project with a four-letter title and enter a Scene number (e.g., 001).
- Save the New Scene in the Project Folder. Dragonframe will store all of its important data there.
- BTW, when it comes to backing up files, add this particular scene folder to your portable drive. It has the camera data you will need.
For a New Take
That is, to make another shot within a given scene or project.
Referring to the Main Menu, go to the Main Menu, File > New Take. From the New Take Window, you can give it a name.
To return to a previous take, go to File > Switch Take. From the Choose Take Window and select the take you need.
Dragonframe Windows
Cinematography Window with Live View
-
- This allows us to see what you are about to shoot, live.
- After a few minutes, the camera will disconnect. To Reset/Refresh Connections, use Command-R.
Camera Settings Window
-
- To achieve the best quality image, you will want to change the settings for shutter speed, f-stop / aperture, and ISO (the sensitivity to light, the sensitivity of the image sensor).
- Refer to the image information or histogram to assess a good balance of light, dark, and tonal values in between.
- Select the appropriate setting for your shoot:
- Picture Style: Select “Standard”
- Image Quality: Choose “Large Fine JPG”
- White Balance: This will depend on the lights you are using. For example, select “Fluorescent” for the lower-power lights on the camera stands, “Tungsten” for the film lights on c-stands in the Animation Puppet Studio.
- External Flash: “Off”
- Stretch: “None”
- Exposure Preview Offset
- You can go ahead and utilize the Test Shot button. Doing so will give you a preview, which Dragonframe stores the image in its own folder.
- Composition Guides:
- Main Menu > View > Composition Guides
- Use this to set Broadcast Safe, the Aspect Ratio Mask, and the like.
- Broadcast Safe:
-
- Click “Show Broadcast Overlay”
- Select “High Def. 16:9”
- Select “Size To > Aspect Mask”
- Aspect Ratio Mask:
- Choose “Aspect Ratio > 16:9”
- In the Cinematography Window
- You can use the slider to adjust the opacity of the aspect ratio mask.
- You can click on and off the TV Safe overlay.
-
- To achieve the best quality image, you will want to change the settings for shutter speed, f-stop / aperture, and ISO (the sensitivity to light, the sensitivity of the image sensor).
Exposure settings
ISO measures the sensitivity of the image sensor. The setting originates from traditional film photography. The same principles apply with digital photography; that is, the lower the number the less sensitive the camera will be to light, and the grain will be finer.
One would set a higher ISO setting in a darker situation to get a faster shutter speed. But, the higher the ISO you choose, the image quality will be “grainier” or “noisier.”
To achieve an ideal image, you will have to strike an optimal balance of lamp position, shutter speed, aperture, and ISO. To this end, you should expect to move the camera lights closer of further to the artwork, adjust the aperture, set the shutter speed, and similarly set the ISO.
Suitable settings to begin with:
-
- ISO: 100
- Aperture: 5.6
- Shutter Speed: Set this according to a suitable reading in the histogram
To focus the camera
Referring to either the Cinematography or Animation Window, you will notice along the bottom-edge of the window, above the Timeline, a form of “target icon” (that is, one that consists of a circle with a cross-shape in the centre).
Click and drag on the focus frame to move it around anywhere in the artwork, with the intention on focussing on the region.
Click on the icon to open a magnification of a specific thumbnail portion of the artwork you have framed. You can use this close-up magnification to focus the fine details of the image, which ensures the whole image is in focus.
From the magnified, detail view, you will notice six buttons with direction arrows; for example, single, double, and triple arrows pointing to the left [ <<< ] [ << ] [ < ] and the same to the right [ > ] [ >> ] [ >>> ]. By clicking on the arrows, you will be able to adjust and fine-tune the focus, in the magnified, detail view.
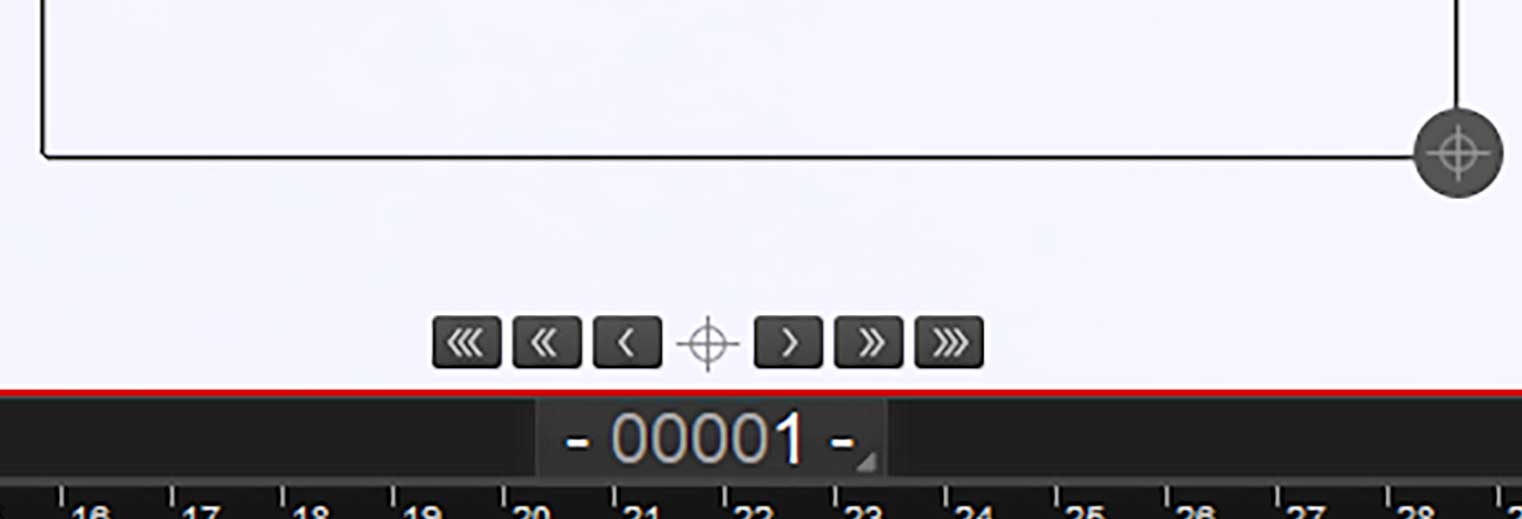
You will not have to focus by manipulating the camera lens!
-
- Triple arrows = a big advance in focus.
- Double arrows = a medium, more precise advance and adjustment.
- Single arrows = precise focus. By clicking once at a time in succession, the focussing is exact and accurate.
To exit the focus area, simply move the curser and click elsewhere in the window.
To push-into artwork
Use this feature when you need to zoom in tighter on artwork, moving tighter and beyond the limit of the zoom on the camera lens.
On the right-hand side of the Dragonframe interface, you will find the Guide Layers properties, bundled with X-Sheet and Notepad tabs.
You can also easily access the Composition Guides as a pop-up window. To do so, from the Animation Window, simply move the mouse to hover the curser in the Animation Window. The pop-up will then appear.
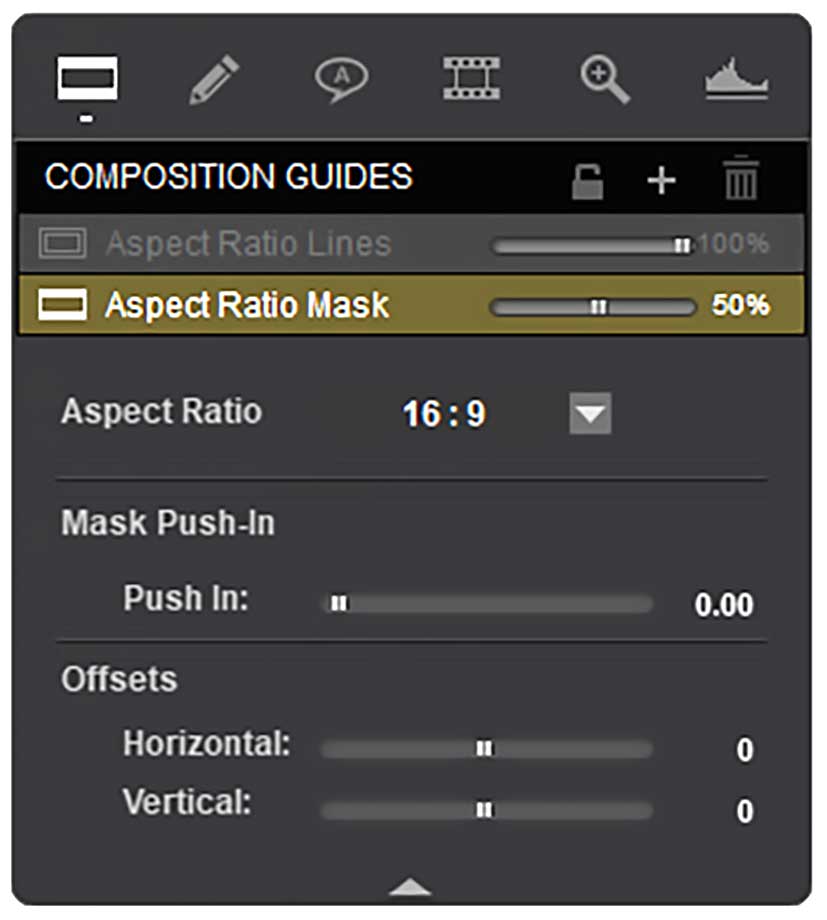
In the Guide Layers properties you will find:
-
- Composition Guides
- Broadcast Safe
- Aspect Ratio Lines
- Aspect Ratio Mask
- Drawing Layers
- Media Layers
- Composition Guides
Select:
-
- The Aspect Ratio and pull-down menu to 16:9
- The Mask Push-In area and move the Push-In Slider, to frame the artwork as you wish.
Animation
-
- X-Sheet
To export a movie clip
Go to the Main Menu > File > Export Movie.
From the Export Movie Window, referring to “Transformation,”
-
- Crop: Select “Crop to Aspect Ratio” and choose “16:9” from the pull-down menu.
- Scale: This will depend on the Image Quality settings you have set, such as “Medium Normal.” You can choose either “100 x 100%” (but you you will probably have to scale down the image in the production software later – but this is good, especially for additional software-based layout and production purposes) or you could enter “1920 x 1080 pixels” for straight-forward production purposes.
- Output:
- Movie Type:
- mp4 (H.264 / AAC) for a compressed file for immediate playback
- QuickTime Uncompressed – for further compositing and production in After Effects or Premiere
- QuickTime Animation Codec – for further compositing and production in After Effects or Premiere
- Quality: Choose a value between “Low” and “High”
- Output Frame Rate: You can opt to “Convert frame rate in output”
- Movie Type:
Click Export.
To export an image sequence
Go to the Main Menu > File > Image Sequence.
From the Image Sequence Window, referring to “Transformation,”
-
- Crop: Select “Crop to Aspect Ratio” and choose “16:9” from the pull-down menu.
- Scale: This will depend on the Image Quality settings you have set, such as “Medium Normal.” You can choose either “100 x 100%” (but you you will probably have to scale down the image in the production software later – but this is good, especially for additional software-based layout and production purposes) or you could enter “1920 x 1080 pixels” for straight-forward production purposes.
- Output:
- Format: From the pull-down menu, choose “PNG”
- Quality: Choose a high value; that is, move the slider to the extreme right-hand side
- File Name:
- Enter a short name that you would like to assign. Use “underscores” in place of spaces
- + Exposure – you can keep this “unchecked”
- + 3 digits should be sufficient, unless you expect to export more than 999 images in this particular instance
- Select “Create separate folders for each exposure”
- Destination: Click “Set” to locate where you intend to export the image sequence. You should establish a folder for the files.
Click Export.