
This tutorial corresponds to an in-class demo for COMD 200 (last updated Fall 2025.) Let’s practice setting up an Adobe Illustrator file, and working with some vector shapes!
Creating a New Document
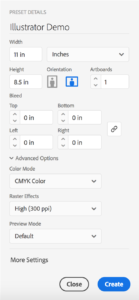
File > New…
If the file is meant for print, it’s a good idea to match the intended paper size. Our files for the COMD 200 movie poster project are going to be 24 inches wide and 36 inches high.
If you’re creating something that’s only for screens and not for print, you might want to look at the presets in the Web or Mobile categories instead. The main differences between the different categories like Print, Web, or Mobile are the default units and colours, and the list of presets conveniently pre-sized for common formats (like standard paper or screen sizes.) You can either start with a preset that’s a good match for your project, or customize your new document however you like.
For this demo, we’re going to choose Letter from the Print presets, set the units to Inches, and choose the horizontal (landscape) orientation.
Artboards is the number of “pages” in your Illustrator document, even though it doesn’t use the word pages here. Each artboard will be one page when you either send your Illustrator file to print, or save it as a PDF. You can also change this at any time while you’re working, which we’ll do below.
Properties
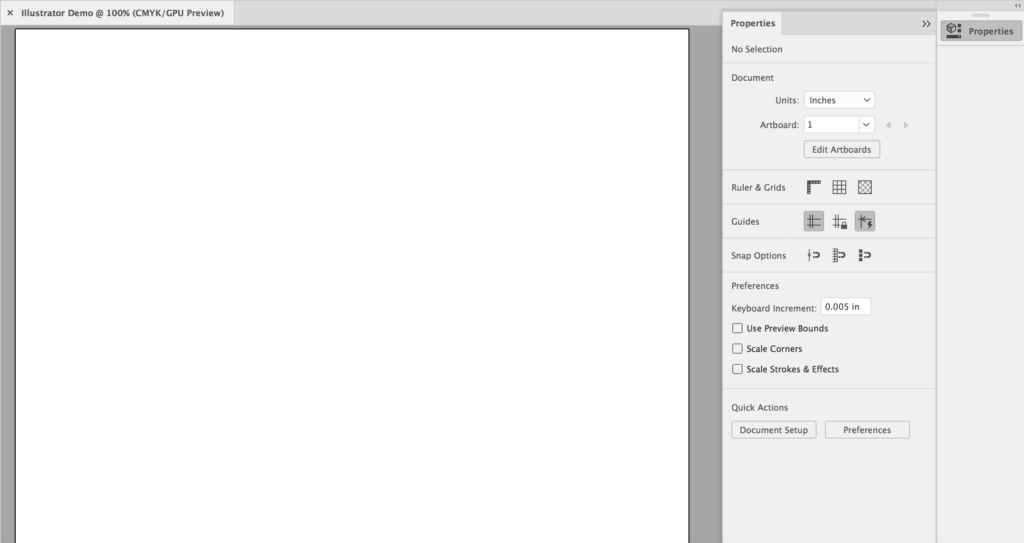
Here’s our new blank document: the white part is the artboard, and the gray part is called the pasteboard. The pasteboard is extra working space that doesn’t print, and isn’t included in exported PDFs and image files.
Let’s look at some settings: look for Properties at the right side of the screen (and if you don’t see it there, it can be opened through the menu with Window > Properties.) A few things to notice:
- Units: You’ll usually want this set to Inches, Millimeters, or Centimeters for print work, and Pixels for web/screen work.
- Rulers & Grids: The first button here turns the rulers on and off – you’ll see them at the top and left sides of the window. Command R also toggles rulers. Clicking and dragging from either ruler drags out a guide line, and right-clicking (or control-clicking, on a Mac keyboard) on the ruler lets you switch units.
- Guides: Illustrator has a few different types of guides and grids to help you work, and they can all also be found under the View menu. They don’t print, or appear in exported PDFs and image files. We’re going to make sure the third Guides icon in the Properties panel, Smart Guides, is on.
- Keyboard increment : You can move Illustrator artwork with the keyboard arrows, and this number is the amount it moves each time you press an arrow key.
- Scale Corners : Controls whether or not rounded corners keep the same proportions when an object is re-sized.
- Scale Strokes & Effects: Controls whether line weights and special effects are re-sized along with an object (for example: with this off, a 1 pt line would stay at 1 pt no matter how the artwork changes size. But with this setting on, if the artwork is doubled in size, a 1 pt line would proportionately become a 2 pt thick line)
The Properties panel changes with context, so we’ll see a few different sets of options show up there while we work.
Workspace
Unless you’ve changed it, your Illustrator interface will start out with an arrangement of tools and panels called “Essentials“…and it’s very simplified. We’re going to switch it to the one called “Essentials Classic“, which makes more of the tools and options visible to us. You can change this by going to Window > Workspace in menu. There are a few different default workspaces available to try, and as you spend more time working in Illustrator you can figure out which you like best for various types of work, and also customize and save your own.

Artboards + Navigating
Let’s edit the artboards in this file, and add a second one. There are a few ways to get to this:
Window > Artboards brings up the Artboards panel, which lists all the artboards in the document, with options for adding, deleting, selecting, and arranging.
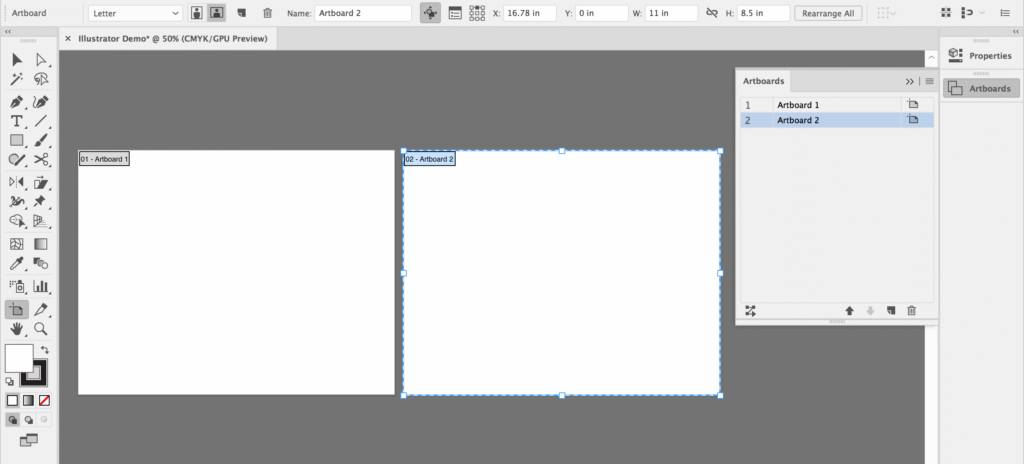
The Edit Artboards button in the Properties panel and Artboard Tool in the Tools panel (the icon looks like a page) both switch the document into an artboard editing mode. Here, you can move and resize artboards freehand. They can also be copied and pasted. Let’s click Edit Artboards, and then click the plus sign (+) icon either at the top of the screen or in Properties to add a second artboard.
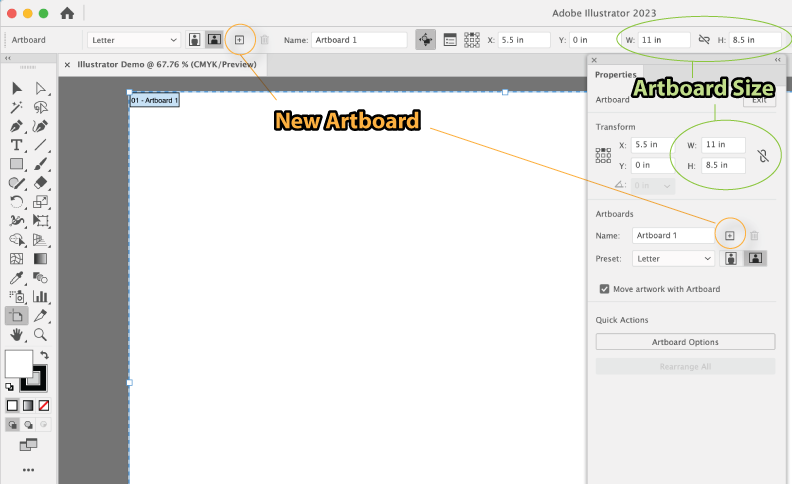
Now that there are two boards, it’s harder to see everything all at once, and we’ll want to be able to easily move the view around and zoom in and out. There are a lot of different ways to do this in Illustrator, with several options under the View menu and in the interface and tools. Let’s try a couple of ways to move and zoom with the keyboard:
- Hold the spacebar on your keyboard, and your cursor becomes a hand, and you can drag around to move the view
- Command (Mac) or CTRL (Windows) and the plus or minus keys will zoom in and out.
- Command (Mac) or CTRL (Windows) Zero (0, the number) will perfectly fit one artboard in the window (the most recent one you’ve clicked on)
These also work in a lot of programs besides Illustrator, including almost all of the Adobe Creative Cloud programs.

You’ll want to pay attention to this button at the top of the screen, which controls whether or not the artwork also moves when an artboard is moved, and whether the artwork copies/pastes along with an artboard.
W & H vs. X & Y: In any Illustrator panel or settings where you see dimensions, W and H are width and height, the size…and X and Y are the position of the object, and act as coordinates. It’s easy to get these mixed up, and wonder why the size isn’t changing with the X and Y numbers.
Basic Shapes
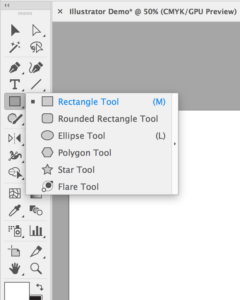 Let’s make some basic shapes. Press down on the Shape Tool (the default is a rectangle) in the Tools panel to see a choice of shapes. For this demo, we’ll make a rectangle and an ellipse. (Note about Polygon and Star: they can be used to make shapes with any number of sides or points. Here’s a reference chart showing a range of polygon and star values, along with some other Illustrator tricks and effects.)
New Shapes: Dragging Vs. Clicking
Here are two ways to draw new shapes:
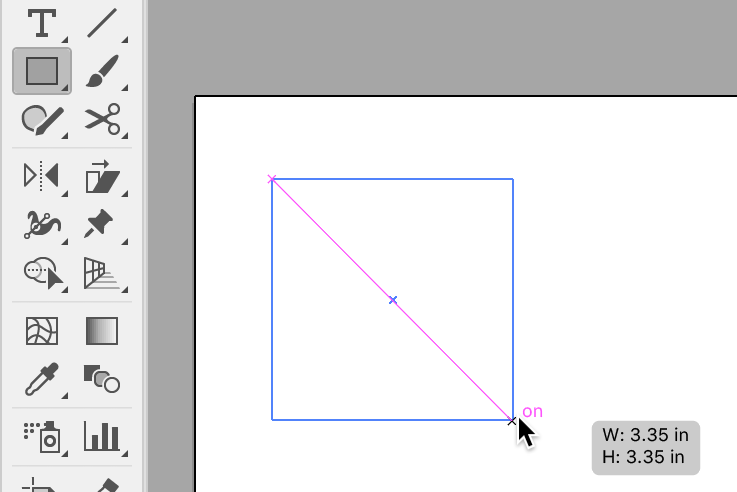
Dragging on the artboard or pasteboard with one of the shape tools draws a new shape. Holding down shift keeps it proportionate, and that’s how to draw a square or a perfect circle. Holding down option/alt will draw from the center instead of the corner. Both shift and option can be used together.
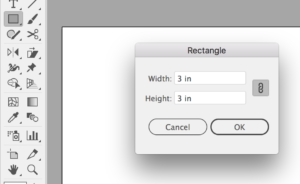
Clicking on the artboard or pasteboard with one of the shape tools brings up a window where you can enter precise measurements for the new shape.
Selecting Objects

The arrows at the top of the Tools panel are both selection tools, with some important differences in how they behave and what they can do.
Selection Tool (Black Arrow)
The darker arrow is the Selection Tool, and it’s for working with entire objects and groups. You can click on objects to select them (hold shift to select multiple objects), or drag from an empty space on the artboard or pasteboard across one or more objects.
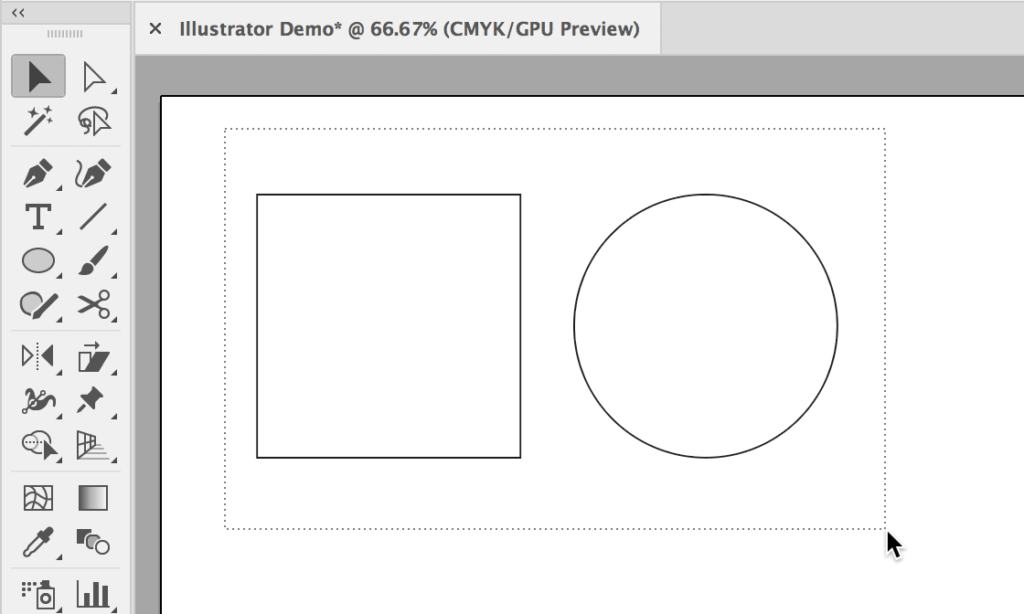
When an object is selected with the Selection Tool, a bounding box (a rectangle outline with handles) will appear.
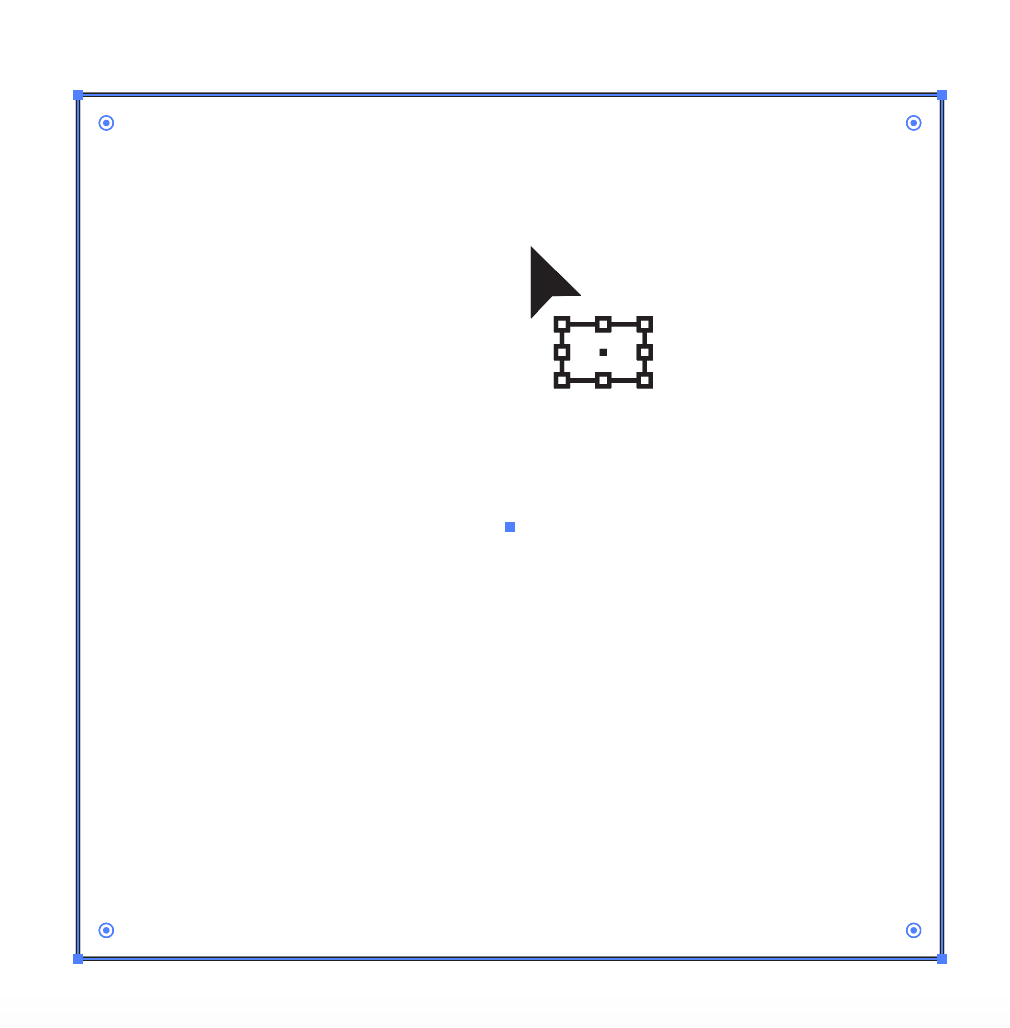
|
Moving: You can drag an object around with the Selection Tool to move it. A little bounding box icon will appear next to the arrow.
Holding shift constrains the move to a straight line, and holding option/alt creates a copy. |
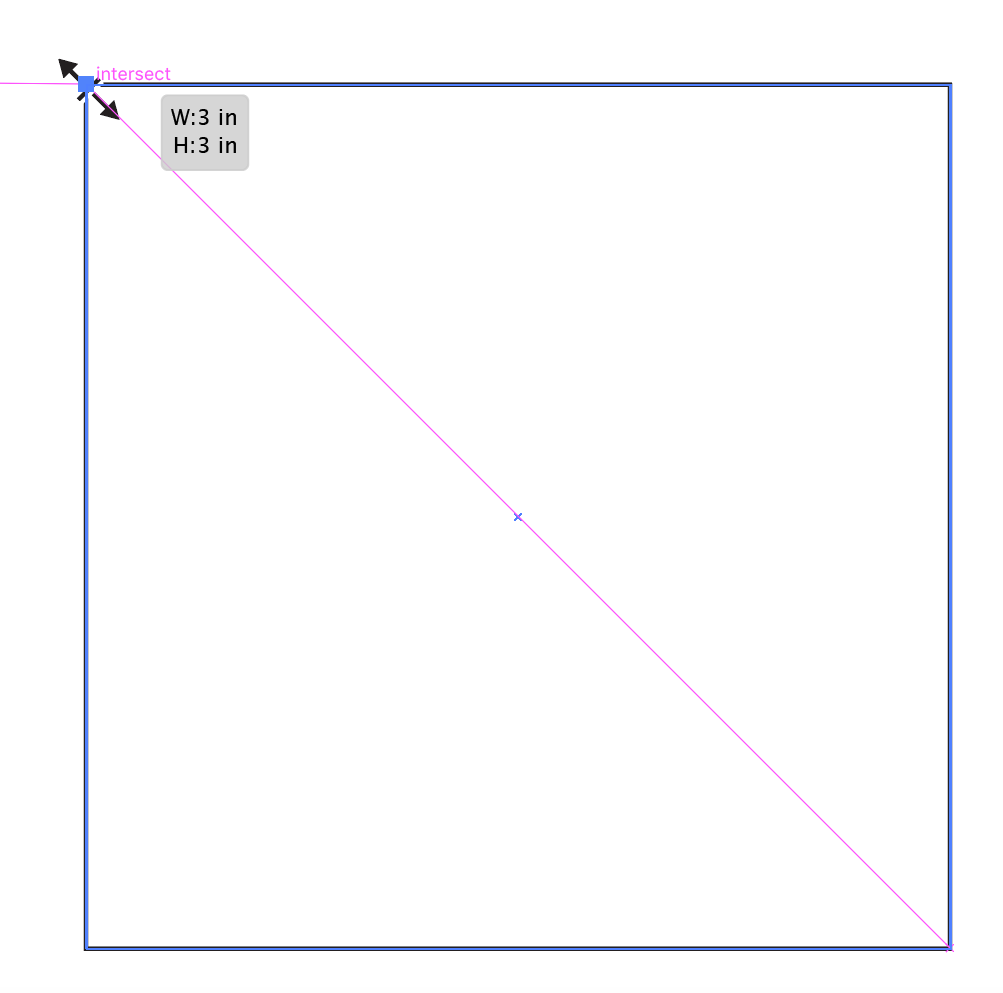 |
Sizing: Drag the bounding box handles to re-size. The handles on the sides change only width or height, and the handles on the corners change both. Holding shift keeps it proportionate, and holding option/alt sizes from the center. |
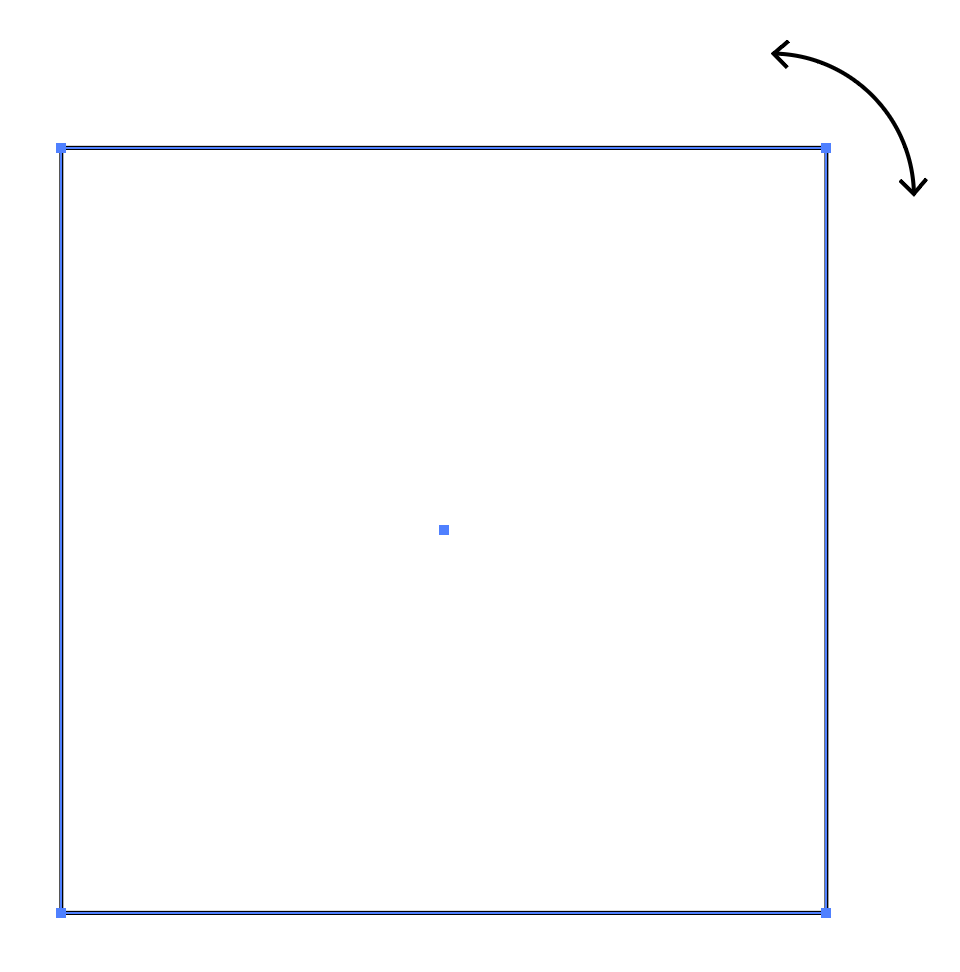 |
Rotate: Hovering the cursor just outside the bounding box handles lets you rotate the shape. |
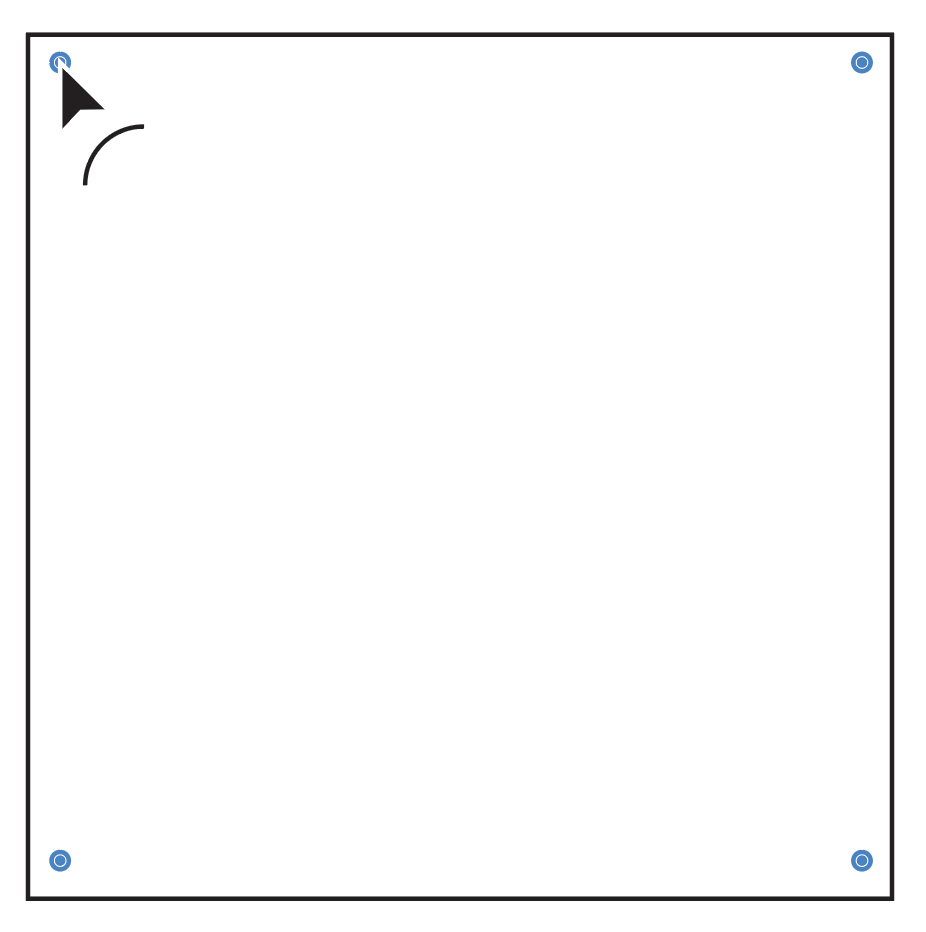 |
Dragging the circle icon next to a corner makes round corners |
Transform, Arrange, Group, Lock
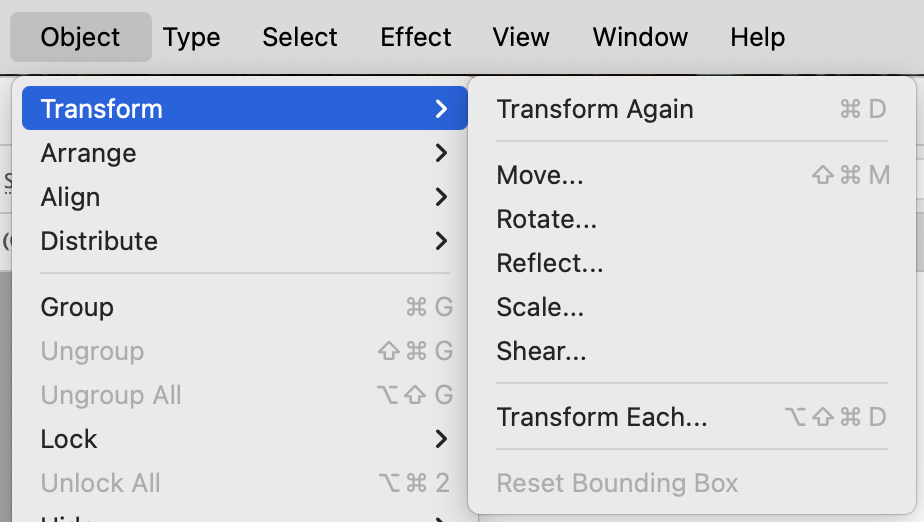
Open the Object menu. At the top, under Transform, there are functions to move, size, and rotate objects, similar to what the Selection Tool arrow can do. Underneath Transform, there are a few more useful things for working with objects:
- Arrange: This is the stacking order, affecting how objects overlap. By default, the most recently drawn object is on top – but objects can be sent forward and backward. (Illustrator also has layers, similar to Photoshop. Arrange affects the order within the same layer, but if you open Window > Layers you can see and move all objects on all layers.)
- Group and Ungroup: Grouped objects move/size/rotate/etc together, without needing to select each piece every time. Double-clicking on a group enters isolation mode for that group.
- Lock and Unlock: Locked objects can’t be selected or edited, so this is very convenient for keeping certain parts of the artwork in place or out of the way while you work on another part. Entire layers can also be locked in the Window > Layers panel.
Direct Selection Tool (White Arrow), and editing anchor points
The lighter arrow is the Direct Selection Tool, and it’s for working with individual points, lines, and pieces within groups.
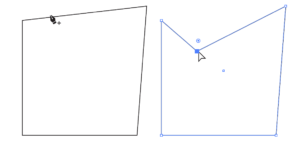
Moving a corner point: Click on a corner with the Direct Selection Tool, and then drag to move the anchor point around. The shape changes! (This is also how to select individual corners for rounding.) Notice how the shape’s anchor points are all visible, but there is no bounding box.

Moving a curve point: Now, click on one of the points in a circle, and drag to move it. Notice how this looks different: the point has handles, and moving the point around changes the angles of the curve.
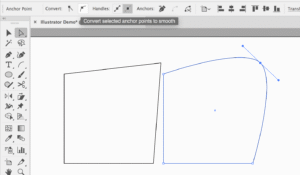
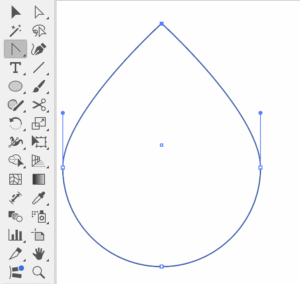
Adjusting curve handles: Now, click on one of the points on a circle, and notice how this looks different. The curve points can be moved in the same way as corner points, but they also have handles that can be adjusted to change the curve angles. A point that has curves on both sides has two handles, and a point connecting a curve and a straight line will only have one handle, on the curve side. The double handles move together, adjusting both sides, but they can also be moved independently by option/alt dragging on a handle.
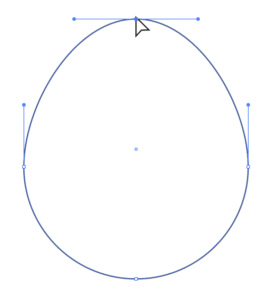
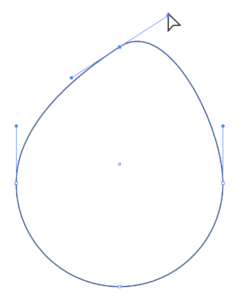
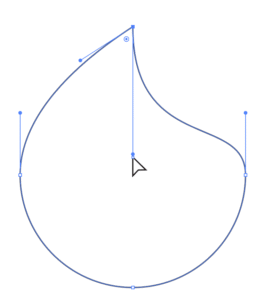
Converting corners and curves: A point can be switched between corner and curve either with the Convert button at the top of the window, or the Anchor Point Tool in the Tools panel.
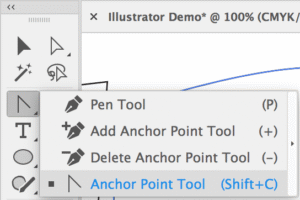
Adding and removing anchor points: The Add Anchor Point and Delete Anchor Point tools do exactly what they sound like: add new points to a line or shape, or remove existing ones. They are found in the Tools panel underneath the Pen Tool, and their keyboard shortcuts are the plus and minus keys.
Pen Tool: The pen tool is one of the most useful and flexible ways to draw in Illustrator, but getting used to how it works can take some practice.

Clicking two points with no dragging makes straight lines, and dragging starts a curve. A point can have curve handles on one or both sides. When you continue from a first curve into other curves, they flow along in the directions the handles point. Click a point a second time to switch it back to a straight corner. For a curve that switches to a totally different angle, option/alt-click on its starting point, and drag out a new handle. Then, make the second point.
To close a complete shape when you get back around to the beginning of the path, click on the first point. A little circle should appear next to your cursor.
Combining Shapes
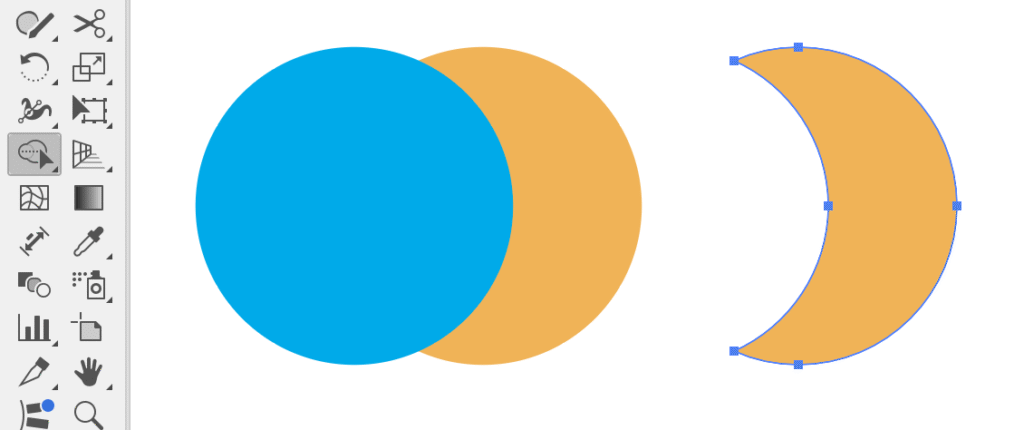
Another way to create complex artwork in Illustrator is to start with basic geometric shapes, and combine them in creative ways. Here’s a reference sheet about how to use two useful tools, Pathfinder and Shape Builder.
Colors
When working with colors in Illustrator, it’s important to pay attention to whether the stroke color (lines, and shape outlines) or fill color (the inside of a shape) is selected. These color squares appear at the bottom of the Tools panel, and also on several other panels, and the one that appears in front is selected. You can click either square to select, or press x to switch which one is in front. Shift X swaps the fill and stroke colors.
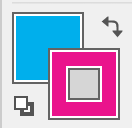
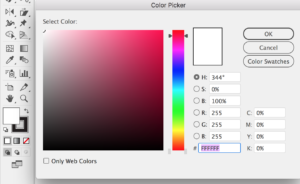
Double-clicking on the color squares brings up a color picker. The red stripe icon underneath the squares means “none” (no stroke, or no fill).
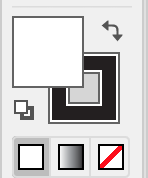
Let’s open some useful panels from the Window menu: Swatches, Color, Stroke, and Transparency:

There are shortcuts to these panels and their settings in many contextual places in Illustrator, and lots of different places to do the same things – see how the squares for Stroke and Fill colors that were on the Tools panel are also on Color and Swatches?
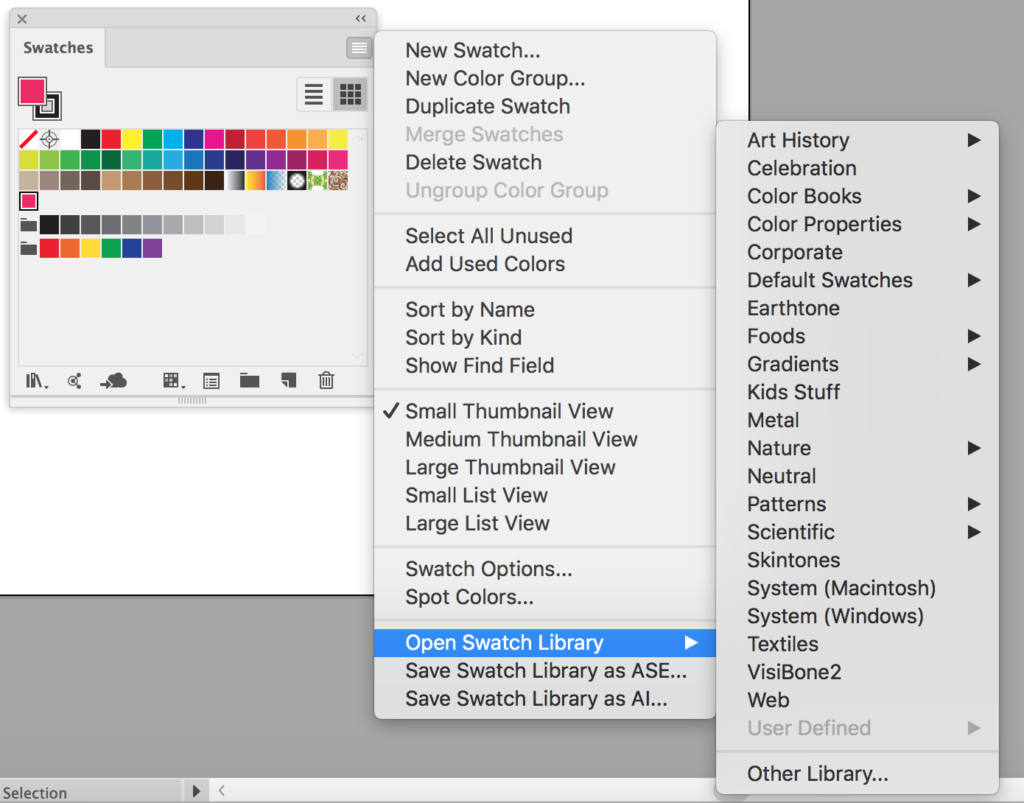
There are three types of swatch, Solid, Gradient, and Pattern, and the Swatches panel is where they can be saved and loaded. (Instructions for creating your own patterns are here.)

The swatches panel for a new file will be a default CMYK or default RGB set, depending on the document setup…but there are some other libraries hidden in the side menu of the Swatches panel. Most are just color palettes, but two very useful categories are Color Books (which has Pantone swatches), and Patterns > Basic Graphics (which has premade line, dot, and grid patterns.)
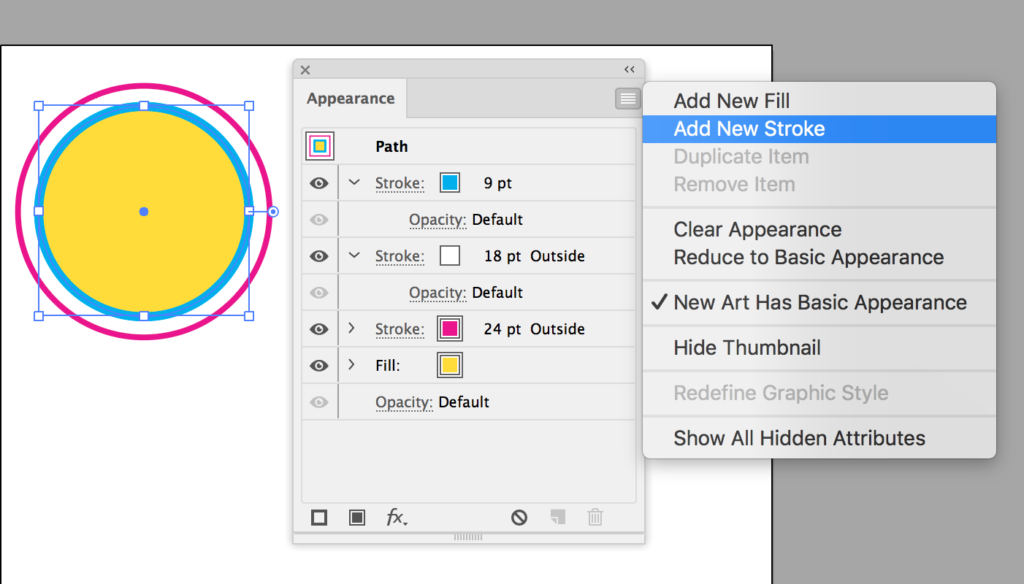
Another useful panel is Appearance, which lists all strokes, fills, and special effects applied to an object, and lets you stack up multiple strokes and fills (for example, here’s a circle with 3 different outlines.)
Type
We usually don’t have a lot of class time to talk about type in this tutorial, but one really important thing to know when working with text in Illustrator is the difference between Point Type and Area Type.
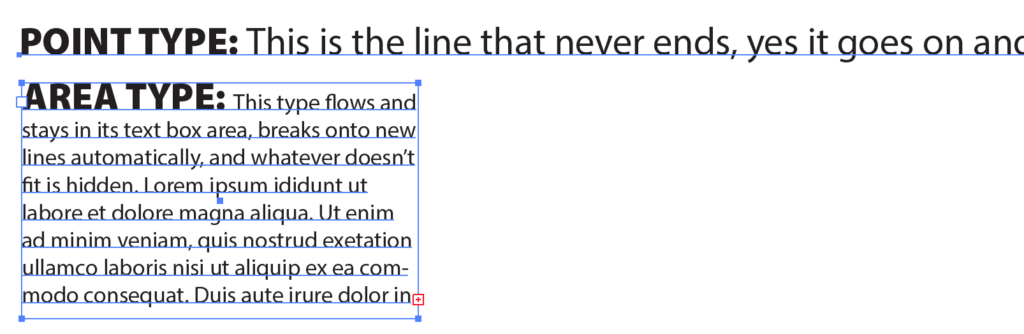
- Point Type is created when you click on the artboard or pasteboard with the Type Tool, without dragging, and start typing. It is not constrained by a box, and will only have multiple lines if you deliberately add line breaks. Resizing it will scale the type size, and resizing it without holding shift will distort the type.
- Area Type is created when you use the Type Tool to drag a shape for a text frame, or click on an existing shape to use it as a frame. Area Type text fits in the shape of its frame, automatically flows onto multiple lines, and any extra text that doesn’t fit in the frame is hidden. This is also how text frames behave in InDesign. Sizing the frame will not change the point size of the text – the text will just reflow to fit the new shape. Area Type text frames don’t have to just be rectangles – they’re vector shapes, with anchor points that can be moved and changed with the same tools as other Illustrator shapes.
- If you select a text box or type object and open the Type menu, you’ll see either “Convert to Area Type” or “Convert to Point Type”, and you can use this to change that type from one to the other.